Project 510: Engine bay v1
For a long, long time, I’ve wanted to clean up the Datsun’s engine bay. It definitely isn’t up to par in the aesthetics department compared to the rest of the car, and makes me hesitate to open the bonnet when people ask to take a look. I’ve always had specific plans for the look I want to achieve, but it would require removing the engine for a full do-over, hence the task being constantly shifted to the “too hard basket”. But the longer I left it, the longer it irritated me, so I came to a compromise; do a quick refresh with the engine still in place, removing all the parts that are easy to detach. Here’s how it went…
99% of the work was completed in one very tiring week after work hours, apart from a few things I did a long time ago, around when the Microtech was installed. Those few things included removing the airbox bracket, the original bonnet stay bracket, and moving the boost controller solenoid out of sight.
To the left of the image is the original and unused bonnet stay, 4 bolts and it’s off.

This image shows both the airbox bracket and the boost solenoid below it.

I found a couple of unused threaded holes behind the strut tower and bolted the bracket there, nice and discreet, and now there’s no wiring conduit snaking around the strut tower from the firewall.

With the two brackets removed and the solenoid banished to it’s hiding spot, we’re now up to date with how things started before the recent revamp.
My game-plan was to remove the intake piping, top radiator brackets, wiper motor, radiator overflow bottle, wiper water bottle, and rocker cover, then scuff up the paint, mask everything up, paint the bay, then paint and clean all the accessories as I re-fit them, and fit new plastic hosing for the radiator and wipers.
Here’s some detail pics of how things started out…


So with that, I started removing parts…


For the parts that I couldn’t remove entirely, such as wiring looms and the brake fluid reservoir, I utilised a handy trick I learnt from another build thread…

Aluminium foil makes a great masking material, then some string to hoist the item off the surface you want to paint.

I bought some scouring pads from an auto paint supplier to rub back the paint to a dull finish, ready to accept fresh paint. Rub/vacuum/wipe, rub/vacuum/wipe, etc, it was a tedious task but it had to be done, the better the prep, the better the finish will be.
New tubing for the radiator overflow and wiper fluid.

I started cleaning up the wiper motor and planned to mask it up and paint certain sections, but one thing lead to another and it ended up looking like this.

No, I’m not trying to protect myself from an alien invasion. It looks a bit funny, but it took a lot of time and proved to be very effective.

Seeing as I was doing all of this during winter in the evenings, I needed some assistance in the form of heat to help with the paint adhesion. This old girl really had some punch.


Fresh paint

After leaving it to set for a couple of days I began to unwrap my present.

Next up was the rocker cover, the central piece of the bay, the first thing you see.

Rubbed-back, masked up, and ready for paint.

I used the same painting technique as I did in the DIY I wrote up.

Again, the heater got put to good use.

While the paint dried, I went to polish up the bolts. To my surprise under all the dirt they were actually stainless, and all they needed was a wipe with prepsol to bring their shine back.

Once bolted back down, I gave the spark plug leads a clean, the above pic shows just the closest one done, you can see the slight difference.

I took the opportunity to clean and re-oil the pod filter while it was off the car.

The original 90 degree joiner on the throttle body was made of rubber and had the evidence of a slight split, so I replaced it with a more modern silicone item.

The exhaust manifold heat shield was looking very tatty, so I wire-wheeled all of the surface rust off it, then painted it.

I also cleaned up the bolt threads with a wire toothbush so they’ll be easier to bolt back in and remove at a later date, as we all know how often they can snap.

I etch-primed it, painted with wrinkle-black, and then used a high-temp clear coat in the hope of maintaining it’s appearance. I’m not holding my breath though, I expect it won’t look like this for very long. In hindsight I should have polished it.

On to the intake cross-over pipe, I always had this idea in my head that it would look good with black exhaust wrap, so I went ahead and did it.

Here’s the wiper water jet hosing in place, nice and new, much better than before. I also polished the circular metal bracket on the firewall to the far left of the image.

Here’s a before and after of the wiring mess behind the passenger-side headlight. Not perfect, but better than before.

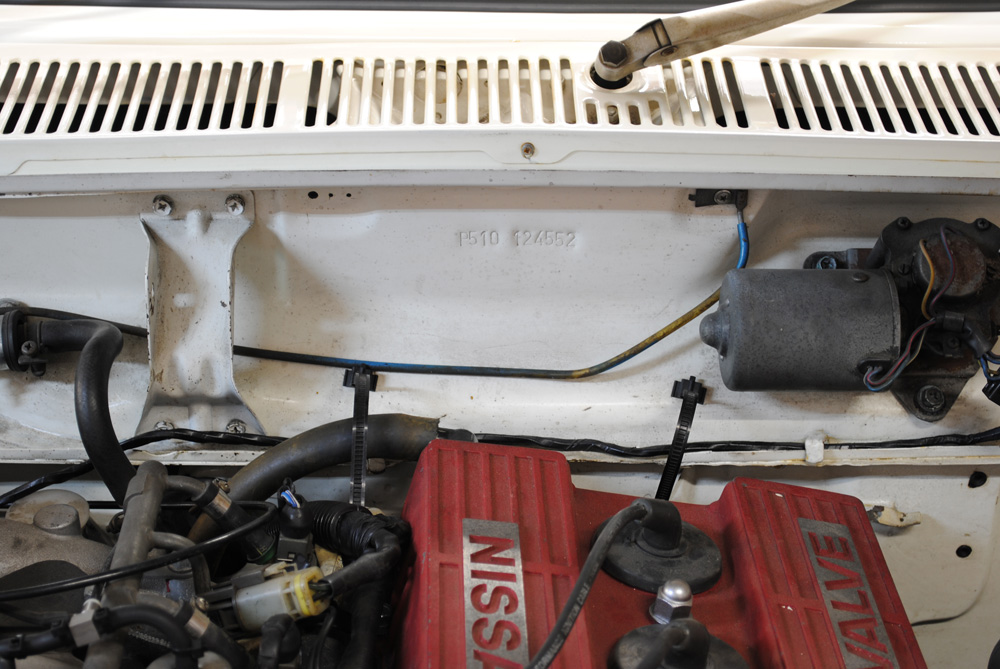
Freshly painted radiator support, wrinkle-black brackets, and new hose for the overflow.

Cleaned and painted wiper motor. I wish I never pulled this thing apart, it was a real pain to put back together, the spring-loaded brushes are a nightmare.

The finished product. Considering the conditions I worked with, the short time frame, and low cost, I’m very happy with the outcome. Apart from what I’ve shown you, there was also plenty more cleaning, scrubbing, sanding, and painting. One day I’ll do a full engine-out, bare-metal overhaul, but until that day comes I can happily live with this.
Next update: Interior.
Original: Build Threads